本教程参考文章:
感谢三位大神为本教程提供参考:
jimmysong
sazerac-kk
letere-gzj
注意
本教程只是草稿,还存在一些潜在的问题,请及时与我联系,或者在评论区留言,后续会不断更新和修改。
1 准备工作:
1.1 安装Git
Git是一个分布式版本控制系统,广泛用于软件开发和其他需要版本控制的项目中。 安装步骤可参考: https://blog.csdn.net/mukes/article/details/115693833
注意
主要命令:
- git init:初始化新仓库
- git clone:克隆远程仓库
- git add:暂存更改
- git commit:提交更改
- git push:推送到远程仓库
- git pull:从远程仓库拉取更新
- git branch:管理分支
- git merge:合并分支
1.2 Hugo的安装
Hugo是一个流行的静态网站生成器。 优点:1.构建速度极快。2.不需要数据库。3.易于部署和维护。
-
- 下载最新版的hugo文件包 https://github.com/gohugoio/hugo/tags

-
- 选择windows系统下的拓展版本:

2 开始搭建
2.1 配置环境变量
- 将下载后的文件解压到你本地创建的文件夹比如
C:\Hugo中,并建立一个C:\Hugo\bin的文件夹,将hugo.exe文件移动到该文件夹中。 选择系统变量的中的变量Path,点击编辑,进入。

- 将
C:\Hugo\bin路径添加到Path,点击确定,完成设置。

2.2 开始搭建hugo站点
- 在
C:\Hugo中进入终端,输入代码:hugo new site mysite
注意
mysite 是网站的路径,可以自定义命名。

- 然后进入该路径
cd mysite在该目录下你可以看到以下几个目录和config.toml文件
 1C:\Hugo\mysite\archetypes
 2C:\Hugo\mysite\assets
 3C:\Hugo\mysite\content
 4C:\Hugo\mysite\data
 5C:\Hugo\mysite\hugo.toml
 6C:\Hugo\mysite\i18n
 7C:\Hugo\mysite\layouts
 8C:\Hugo\mysite\static
 9C:\Hugo\mysite\themes
10C:\Hugo\mysite\archetypes\default.md
Nice! 此时你已经完成了hugo的基本构架!
2.3 设置hugo网页的主题
- 主题的下载和安装 你可以在 Hugo 官方社区上选择你喜爱的主题。 这里以[Blowfish] (https://themes.gohugo.io/themes/blowfish/) 为例进行后续的演示操作:

- 进入该主题的GitHub仓库: https://github.com/nunocoracao/blowfish 进行下载:
- 你可以通过手动下载的方式,然后将该主题文件解压到你的
C:\Hugo\mysite\themes目录中去。
要将文件名改为
blowfish- 也可以使用以下命令行在终端安装(需要开启全局代理):
- 你可以通过手动下载的方式,然后将该主题文件解压到你的
1cd mysite
2git init
3git submodule add -b main https://github.com/nunocoracao/blowfish.git themes/blowfish
- 主题的本地化配置-文件配置
- 在你的网站根目录
C:\Hugo\mysite中,删除 Hugo 自动生成的hugo.toml文件。 - 从文件夹
C:\Hugo\mysite\themes\blowfish中复制config,layouts,assets,static文件,粘贴到C:\Hugo\mysite目录中。 - 从文件夹:
C:\Hugo\mysite\themes\blowfish\exampleSite中复制content,粘贴到C:\Hugo\mysite目录中。 - 删除掉
C:\Hugo\mysite\content\samples目录中rich-content文件夹
- 在你的网站根目录
- 主题的本地化配置-参数配置
打开
C:\Hugo\mysite\config\_default\hugo.toml文件(推荐使用visual stutio code打开和编辑),进行基础参数的修改。
1theme = "blowfish" # UNCOMMENT THIS LINE
2baseURL = "https://anikelin.github.io/"
3defaultContentLanguage = "en"
- 主题的本地化配置-进阶配置 详细的教程可以参考该主题的官方教程文件 https://blowfish.page/zh-cn/ 这一过程可能需要花费一些时间。
- 主题的本地化配置-启动服务
在
C:\Hugo\mysite目录下进入终端运行:hugo server -D

- 点击 http://localhost:1313/

- 该界面就是hugo生成的本地网页文件
3 网页部署
3.1 生成静态资源文件夹
- 在
C:\Hugo\mysite目录下进入终端运行:hugo,就会生成一个名为public的静态资源文件夹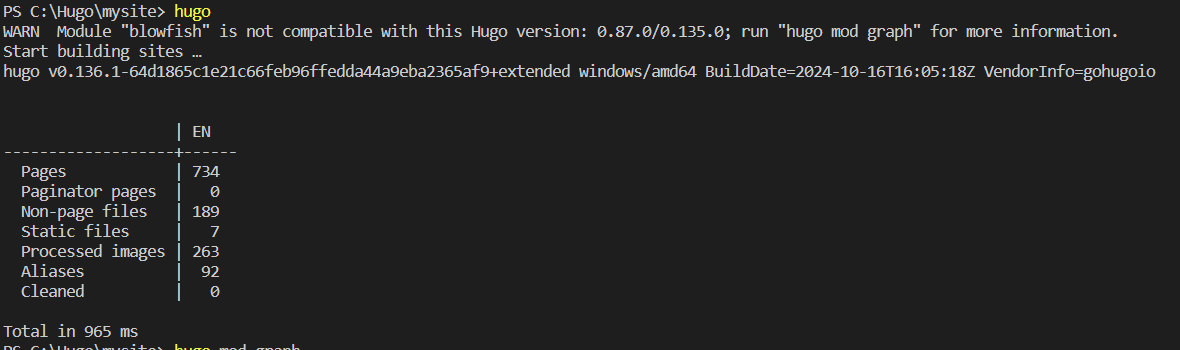

3.2 建立一个静态页面的仓库
访问GitHub创建账号。使用GitHub Pages 将托管你的网站。
-
- 首先在 GitHub 上创建一个以
username.github.io命名的项目。
- 首先在 GitHub 上创建一个以

-
- 仓库构建完成后,点击进入仓库的
setting选项:
- 仓库构建完成后,点击进入仓库的

-
- 进入后点击
Pages选项: 可以看到 此时 GitHub Pages已经为你生成了一个网页链接https://anikelin.github.io/(红框)。这将是你之后blog的网站地址。
- 进入后点击
提示
如果没有出现网址,请将按照黄色框进行设置,
source选择Deploy from a banchBanch选择/main/(root),点击Save.等待一会儿后刷新界面就可以了。

3.3 上传到GitHub远程仓库
-
首先在
C:\Hugo\mysite\public目录下进入终端运行 -
初次推送到仓库的代码
1git init
2git add .
3git commit -m "first commit"
4git branch -M main
5git remote add origin {你的github仓库地址}
6git push -u origin main
- 第一次上传需要输入账号密码,否则会出现以下报错:

- 解决办法:
1git config --global user.email "you@example.com"# 你的GitHub注册邮箱
2git config --global user.name "Your Name"#你的GitHub用户名
- 运行后,你将获得一个验证的 device code:

- 转到:(https://github.com/login/device) 登录你的账号 并输入该device code
使用
git push -u origin main可能会出现以下报错:

-
报错原因: 远程仓库的
main分支出现了本地没有的更新,比如你在推送本地文件到仓库前手动添加了readme文件。 -
解决办法:
1git init
2git add .
3git commit -m "update"
4git branch -M main
5git remote set-url origin https://github.com/AniKeLin/AniKeLin.github.io
6git push -u origin main --force # 加force 表示强制推送
- 推送成功后将看到:

3.3 Github Action 自动部署
注意
本节的方法部署稳定但流程复杂,可以跳过
3.3查看最近更新使用更加简单的方法。
- Github Action 的token设置
- 前往
profile的Settings -> Developer Settings -> Personal access tokens,创建一个token(classic)。
- 前往

New personal access token (classic)界面后,参照图片中红框的设置。


- 配置仓库的secret
- 新建一个GitHub仓库,这里我将其命名为
Hugo,这个仓库建议将其设置为Private。
- 新建一个GitHub仓库,这里我将其命名为

Settings界面

- 左边的菜单栏找到`Actions`界面

- 为该仓库新建一个Repository secrets

Name 设置为:GH_TOKEN , Secret为你刚刚保存的token代码。点击add Secret,进入下一步

- 本地文件配置:
- 在你的网站根目录
C:\Hugo\mysite中创建一个.github/workflows/deploy.yaml文件:
- 在你的网站根目录
 1name: deploy
 2# 代码提交到main分支时触发github action
 3on:
 4push:
 5	branches:
 6	- main
 7jobs:
 8deploy:
 9	runs-on: ubuntu-latest
10	steps:
11		- name: Checkout
12		uses: actions/checkout@v4
13		with:
14			fetch-depth: 0
15
16		- name: Setup Hugo
17		uses: peaceiris/actions-hugo@v3
18		with:
19			hugo-version: "latest"
20			extended: true
21
22		- name: Build Web
23		run: hugo -D
24
25		- name: Deploy Web
26		uses: peaceiris/actions-gh-pages@v4
27		with:
28			PERSONAL_TOKEN: ${{ secrets.GH_TOKEN }}
29			EXTERNAL_REPOSITORY: AniKeLin/AniKeLin.github.io #你的github名/你的仓库名
30			PUBLISH_BRANCH: main
31			PUBLISH_DIR: ./public
32			commit_message: auto deploy
- 在目录
C:\Hugo\mysite中创建.gitignore文件,来避免提交不必要的文件。
1# 自动生成的文件
2public
3resources
4.hugo_build.lock
5# hugo命令
6hugo.exe
- 在目录
C:\Hugo\mysite中运行终端将所有文件在上传到仓库,上传成功后会触发Github Action,来自动部署你的静态页面。
1git init
2git add .
3git commit -m "first commit"
4git branch -M main
5git remote add origin https://github.com/AniKeLin/Hugo.git # 替换成{你的github 部署 仓库地址}
6git push -u origin main
后续本地文件更新后只需要在C:\Hugo\mysite运行终端,使用Git推送到AniKeLin/Hugo.git仓库.
1git init
2git remote set-url origin https://github.com/AniKeLin/Hugo.git # 替换成{你的github 部署 仓库地址}
3git add .
4git commit -m "update"
5git push
4 补充
4.1 注意事项
本教程中容易混淆的地方:
1.在GitHub中一共建立了两个仓库,分别为静态网页文件的发布的仓库AniKeLin.github.io(命名要用 {github用户名}.github.io),简称网页仓库。以及Github Action自动部署的仓库Hugo.git,简称部署仓库。
2.二者区别:将C:\Hugo\mysite\public的所有文件传送到网页仓库AniKeLin.github.io。将C:\Hugo\mysite的所有文件传送到部署仓库Hugo.git。
4.2 报错情况
自动部署时出现:
```
Run peaceiris/actions-gh-pages@v4 [INFO] Usage https://github.com/peaceiris/actions-gh-pages#readme Dump inputs Setup auth token Prepare publishing assets Setup Git config Create a commit Push the commit or tag /usr/bin/git push origin main remote: Permission to KeL1n1995/KeL1n1995.github.io.git denied to github-actions[bot].
fatal: unable to access 'https://github.com/KeL1n1995/KeL1n1995.github.io.git/': The requested URL returned error: 403 Error: Action failed with "The process '/usr/bin/git' failed with exit code 128"
```
解决方法:
- 提供正确的 Token 权限
确保 GitHub Actions 拥有访问仓库的权限。你可以使用 secrets 来安全地提供令牌。
-
生成 GitHub Personal Access Token (PAT):
- 访问 GitHub 的 Personal Access Token 页面。
- 创建一个新的 token,勾选
repo权限(用于访问私有仓库)。 - 复制生成的 token。
-
将 token 添加到 GitHub Actions secrets:
- 在你的 GitHub 仓库中,进入 Settings -> Secrets and variables -> Actions。
- 点击 New repository secret,命名为
GH_TOKEN(或者任何适当的名称),然后将你刚刚创建的 Personal Access Token 作为值。
这里设置的是
secret而不是environment variable!
4.3 方法更新
最近在尝试其他主题的过程中发现了本地更新后同步到网页端的另一种方法,不需要在
步骤 3.3后再建立一个部署仓库。
4.3.1 创建 deploy.sh 脚本文件
- 在命令行中运行以下全部脚本,将在所在目录生成一个
deploy.sh。
–注意替换为你自己的远程仓库地址。–
 1# Windows PowerShell
 2echo @"
 3#!/bin/bash
 4#!/bin/bash
 5# 删除现有的 .public 文件夹
 6rm -rf public
 7
 8#重新建站
 9hugo
10
11#推送新的public
12cd public
13
14# 删除现有的 .git 文件
15rm -rf .git
16
17# 重新初始化 gi
18git init
19
20# 添加远程仓库,注意替换为你自己的远程仓库地址
21git remote add origin https://github.com/AcaKeLin/AcaKeLin.github.io.git
22
23# 选择远程仓库,注意替换为你自己的远程仓库地址
24git remote set-url origin https://github.com/AcaKeLin/AcaKeLin.github.io.git
25
26# 创建并切换到 main 分支
27git checkout -b main
28
29# 添加所有文件
30git add .
31
32# 提交更改
33git commit -m "update"
34
35# 推送到远程仓库
36git push -u origin main --force
37"@ | Out-File -encoding utf8 deploy.sh
4.3.2 在 根目录的命令行中运行这个脚本:
1./deploy.sh